
Kubernetes clusters enable an organization to easily take advantage of containerization. While this is a huge asset, it also creates security issues. Many organizations lack visibility into the applications within their Kubernetes cluster and their attack surface.
Within a Kubernetes cluster, an organization can be running websites, microservices, and APIs. The problem with these applications is that they are very likely to contain exploitable vulnerabilities. In fact, the average web application contains 22 vulnerabilities, 4 of which are labeled as critical.
Securing these applications against exploitation requires patching these vulnerabilities. However, the sheer complexity of a Kubernetes deployment and the number of vulnerabilities in the applications that it contains can make this difficult or impossible.
Virtual patching provides a solution. Virtual patching involves blocking attacks trying to exploit known vulnerabilities rather than trying to patch the applications itself. While this approach can be just as effective in increasing application security, it requires a web application firewall (WAF), which is not built into Kubernetes by default.
Why Update to Wallarm’s Nginx Ingress Controller?
Wallarm’s Nginx Ingress controller includes an integrated web application firewall (WAF). This enables it to provide API security and Layer 7 protections for applications. Its capabilities include:
- Securing a variety of API protocols including JSON, XML, SOAP, and others
- XSS, XXE, SQL Injections, RCE and other OWASP Top 10 threats protection
- Blocking brute-force attacks, dirbusting, and account takeover (ATO)
- Detection of application abuse and logic bombs
- Protection against automated attacks (bots)
Upgrading the traditional Nginx Ingress controller to Wallarm’s Ingress controller enables an organization to dramatically decrease the vulnerability of its Kubernetes-based applications to attack.
Installing the Wallarm Controller
- Deploy the controller in a non-production environment in monitoring mode
- Monitor operations and modify configuration settings as needed
- Deploy the controller in a production environment in monitoring mode
- Allow to run for 1-2 weeks to enable the system to learn about your environment
- Set non-production controller to blocking mode
- Test deployment to ensure that it is working as expected
- Set production controller to blocking mode
- Test deployment to ensure that it is working as expected
Following this process minimizes the probability that production systems’ availability or operations will be negatively impacted by a configuration issue. For each deployment environment, the Wallarm Ingress controller can be deployed in three stages:
- Installing/upgrading the controller
- Enabling traffic analysis
- Testing installation and configuration
Installing/Upgrading the Ingress Controller
The first stage in this process is to install the newest version of the Wallarm Ingress controller. To install a new Wallarm Ingress controller or upgrade an existing one, perform the following steps:
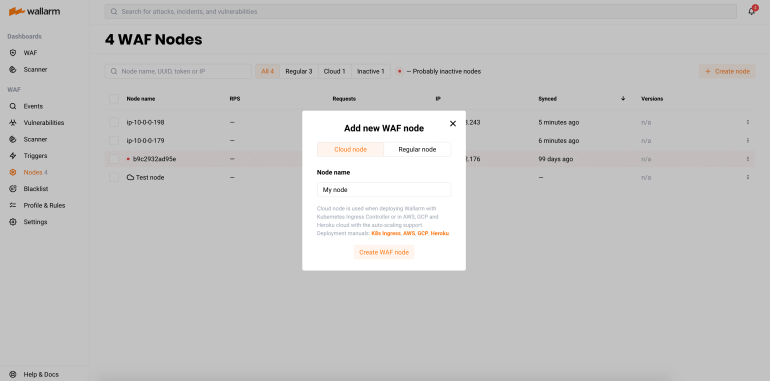
- Go to the Nodes tab of your Wallarm account (EU cloud, US cloud)
- Create a filter node with the Cloud type and copy the token.
- Clone the Github repository of Wallarm NGINX Ingress with the command
git clone https://github.com/wallarm/ingress-chart
- Install or replace the Wallarm Ingress controller
Install: Run the command helm install --set controller.wallarm.enabled=true,controller.wallarm.token=<YOUR_CLOUD_NODE_TOKEN>,controller.wallarm.apiHost=<WALLARM_API_HOST> <INGRESS_CONTROLLER_NAME> ingress-chart/wallarm-ingress -n <KUBERNETES_NAMESPACE>
- <YOUR_CLOUD_NODE_TOKEN> is the token value you've received earlier
- <WALLARM_API_HOST> is api.wallarm.com for the EU cloud or us1.api.wallarm.com for the US cloud
- <INGRESS_CONTROLLER_NAME> is the name of the Ingress controller
- <KUBERNETES_NAMESPACE> is the namespace of your Ingress
Replace: Run the command helm upgrade --set controller.wallarm.enabled=true,controller.wallarm.token=<YOUR_CLOUD_NODE_TOKEN>,controller.wallarm.apiHost=<WALLARM_API_HOST> <INGRESS_CONTROLLER_NAME> <KUBERNETES_NAMESPACE> --reuse-values
Enabling Traffic Analysis for Your Ingress
Once the Wallarm Ingress controller is installed, the next step to take is to enable it to start performing traffic analysis. To do so, run the following commands:
- kubectl annotate ingress YOUR_INGRESS_NAME nginx.ingress.kubernetes.io/wallarm-mode=monitoring
- kubectl annotate ingress YOUR_INGRESS_NAME nginx.ingress.kubernetes.io/wallarm-instance=INSTANCE
In these commands:
- YOUR_INGRESS_NAME is the name of your Ingress,
- INSTANCE is a positive number that is unique to each of your applications or application groups. This will allow you to obtain separate statistics and to distinguish between attacks aimed at the corresponding applications.
Testing Wallarm Ingress Controller Operation
At this point, your Wallarm Ingress controller should be up and running. To test its operation, do the following:
- Run the command
kubectl get po -l release=INGRESS_CONTROLLER_NAMEto get a list of pods
- Replace
INGRESS_CONTROLLER_NAMEwith the name of your Wallarm Ingress controller - All pods should have a status of
Runningand a Ready value ofN/Nwhere both values of N are the same.
- Run a simulated attack against your Kubernetes cluster as described here
- Confirm that the attack is shown in the event list on the Events tab of your Wallarm account (EU cloud, US cloud)
If all of these steps are completed, then your Wallarm Ingress controller has been successfully installed within your Kubernetes cluster.
Optimizing Your Wallarm Ingress Controller
After completing these steps, your Wallarm Ingress controller should be successfully installed and operational. This enables it to provide protection against a variety of attacks that may target your Kubernetes cluster at the application layer.
However, while the Ingress controller is installed, some configuration steps should be taken to improve its operation. These steps are described in the other two articles in this blog series.
In the second article in this series, we will discuss how to configure the Wallarm Ingress controller to properly handle IP addresses. This includes receiving the correct end user IP address in a load-balanced environment, configuring the controller to block malicious IP addresses, and ensuring that trusted security tools (like Wallarm scanner nodes) are not blocked due to their use of attack traffic during vulnerability scans.
The final article in this series describes how to configure the Wallarm Ingress controller for use in production environments, including steps to improve availability and security visibility. This enables you to enjoy the benefits of robust Kubernetes security without suffering degraded performance for containerized applications.


